Repairing Epoxy Floors in Woodbury, MN: Peeling, Recoats and Removal
Most failing floors trace back to how the slab was prepped. Check yours with three simple tests, see what can go over the old finish, size up the cracks, and know when the whole coating, or the slab itself, has to go.
Background: stock photo of a coating worn through in a parking deck, not one of our projects.
Why Coatings Peel, and What Garage Floor Repair Companies Check First
A coating almost never fails because the resin was bad. It fails because of what it was asked to stick to. The median Woodbury home was built in 2000, by the Census Bureau’s 2024 survey, so roughly half the garage slabs in town have a quarter century of winters behind them. Plenty of those already carry a first coating of some kind, from a weekend kit to a professional system, and that first coat is often the thing that needs fixing.
Prep shortcuts. An acid wash only reaches the smoothest end of the concrete profile scale; epoxy data sheets ask for a ground profile (one lists ICRI CSP 3 to 4 by “appropriate mechanical means”). Over an etched or merely swept slab, the coating sits on dust and laitance instead of concrete.
Moisture from below. Vapor moving up through a slab pushes on the underside of a non-breathing film until it blisters or lets go. One epoxy sheet sets its limit at 85% relative humidity measured by ASTM F2170. Lower-level and newer slabs are the usual suspects. A white, powdery residue in the blisters or along a crack is efflorescence: salts carried up by that water and left behind when it dries. It is a sign the moisture problem is still active, and one flake maker states plainly that its chips do “not protect against efflorescence.”
A coat over sealer or paint. Plenty of garages were sealed by the builder or painted by an owner before anyone thought about epoxy. A coating over either is bonded to the sealer or the paint, never to the slab.
Hot tire pickup on thin films. Warm tires soften a thin coating, grip it as they cool, and peel it up when the car backs out. That is why so many kit floors fail in two neat stripes.
Salt at the door. Twin Cities (MSP) weather crosses the freezing mark roughly 75 days a year, and brine dripping off cars soaks into any opening in the coating near the door. Deicers “tend to amplify freeze-thaw deterioration,” in the words of one concrete industry sheet, so the first few feet inside the door are where coatings and concrete both give up first.
Ambering in the sun. A floor that has turned yellow or chalky where daylight reaches it usually has plain epoxy as its last coat. One epoxy maker’s sheet says it directly: “Surface discoloration of product may occur when exposed to UV rays.” That is a looks problem, not a bond problem. If the checks below pass, a yellowed but sound floor is a recoat candidate with a UV-stable topcoat, not a removal.
Good garage floor repair companies start the same way we do: find out which of these happened before talking about a fix, because the answer decides whether the job is a patch, a recoat or a removal. If the coating turns out sound and you simply want a new look, that is closer to a fresh epoxy floor coating than a repair.
Three Adhesion Checks Before Repairing an Epoxy Floor
You can learn most of what an estimator learns in the first ten minutes with a utility knife, duct tape, a putty knife and a coin. The point isn’t to diagnose every flaw, it is to find out whether the coating is stuck to the concrete, stuck to something weaker, or barely stuck at all.
Do the knife cuts somewhere you don’t mind a small scar. If the floor is going to be recoated or removed, it won’t matter.
Three adhesion checks
Do them in order, on the worst area and on one area that looks fine. Pick what you saw to read what it usually means.
-
Check 1: a tape peel test on a scored X
With a sharp utility knife, cut an X about two inches across through the coating, down to the concrete. Press a strip of duct tape hard over the X, rub it down with a thumbnail, then rip it off fast at a low angle. Do it once in the tire lanes and once in a corner that looks fine.
What came up with the tape?
- Comes off clean
- The coating let go of the concrete, and the back of the flake is smooth or dusty. That is a bond failure at the surface: usually an acid wash instead of grinding, a coat over sealer or dust, or a slab that was too wet. If it happens in the corner too, the whole floor likely shares the problem, and anything recoated on top inherits it.
- Leaves concrete on the back
- The coating gripped harder than the top skin of the concrete, and the concrete gave way. The bond was fine; the surface under it was weak, salt-scaled or wet. Where it is limited to one area, that area gets cut out, the weak concrete ground off and patched. Where it is everywhere, plan on removal and a moisture test.
- Won’t lift
- Good adhesion at that spot. If the tape pull holds in both places and the other two checks agree, the floor is a candidate for sanding and recoating instead of stripping.
-
Check 2: a putty knife at a peeling edge
Find an edge that has already chipped or lifted. Slide a stiff putty knife under it and push gently along the floor, the way you would lift old wallpaper. Don’t pry hard or hammer it; you’re testing how far the failure has spread, not forcing it.
How did the edge behave?
- Comes off clean
- If the coating peels back in sheets with a smooth underside, the bond failure runs well past the chip you can see. Spot repairs on a floor like this keep chasing new edges; grinding the coating off is usually cheaper in the end.
- Leaves concrete on the back
- Chunks of concrete come up stuck to the coating. Look at where it is: near the door it points to salt and freeze-thaw damage in the slab surface, in the middle of a lower-level slab it points to moisture. The concrete gets repaired before anything is recoated there.
- Won’t lift
- The knife stops at the edge of the chip. The failure is local, often an impact, a dropped tool or a hot-tire spot. That is a spot repair: cut back to sound coating, feather the edge, patch and blend.
-
Check 3: a tap test for hollow coating
Tap the floor every foot or so with a coin edge or the handle of a screwdriver, working across both tire lanes and the area inside the door. Sound coating gives a sharp click. A loose film gives a duller, papery or hollow note. Mark each dull spot with painter’s tape.
What did you hear?
- Solid everywhere
- No loose patches found. Whatever is peeling is probably limited to the areas you can already see.
- Hollow in patches
- The coating has let go in those patches even if it still looks intact, and they will be the next ones to peel. The taped areas get cut out and repaired along with the visible damage, so count them before you compare repair against removal.
- Hollow across the lanes
- When most of the driving lanes sound dull, the film is mostly riding on the floor rather than bonded to it. That floor is a removal job, and a recoat on top would come up with it.
These are rough field checks, not adhesion tests. A lab-grade number comes from a portable pull-off tester run to ASTM D7234 (coatings on concrete; ASTM D4541 is the version for metal). The checks tell you which conversation to have; the estimate should say which tests were actually run.
Recoating an Epoxy Floor: What Can Go Over the Old Finish
Every two-part coating has a recoat window, the stretch of hours when the next coat still bonds chemically to the last. It is short. One epoxy data sheet lists 8 to 24 hours at 68°F, and 24 to 48 hours at 50°F. One polyaspartic sheet says a broadcast embedment coat “must be kept clean and recoated within 72 hours.” A floor that went down years ago is far past any window, so the only bond a new coat gets is mechanical: the scratch pattern left by sanding or screening.
That is why a sound professional epoxy can often be recoated without stripping it, and why paint, thin kits and sealers can’t. The honest version of this answer sometimes costs us a bigger job: if your old floor passes the checks and you only want a fresh look, we would rather sand and recoat it than grind off a coating that was doing its job.
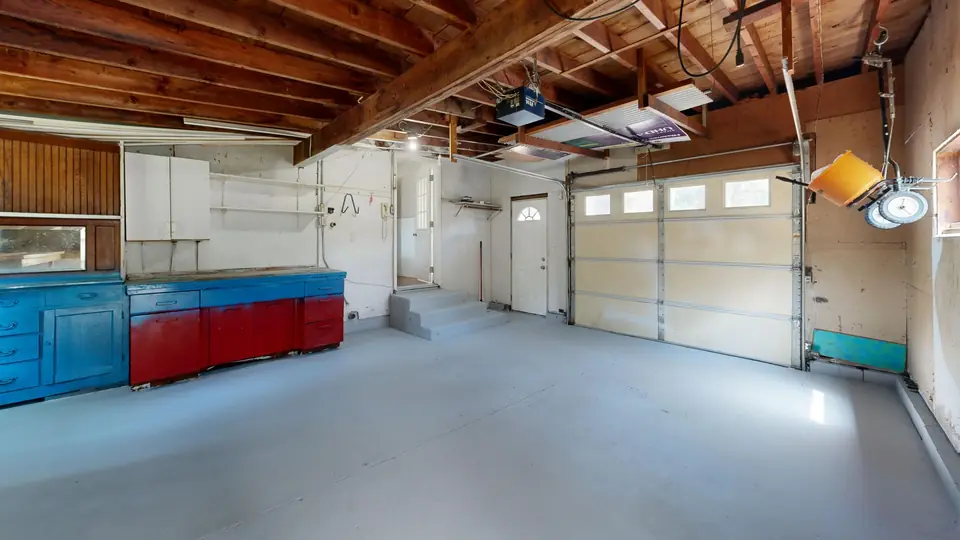
What can go over what
Pick what is on the floor now and what you want on it next. The whole lookup is in the table underneath.
Pick both above, or read the full table below.
| On the floor now | New two-part epoxy | Polyaspartic or polyurea topcoat | A full flake system |
|---|---|---|---|
| One-part garage paint | Grind to concrete Paint dries; it never bonds the way a two-part coating does. Whatever goes on top is only as stuck as the paint underneath. | Grind to concrete Fast-cure topcoats pull hard as they cure and will lift weak paint with them. | Grind to concrete The thickest build on this chart needs bare, profiled concrete, not a painted skin. |
| DIY water-based epoxy kit | Test first Only if the kit passes all three checks everywhere and you want a fresh coat of the same kind. One failed check and it gets ground off. | Grind to concrete Kit films are thin and usually went down over an acid etch. A harder-pulling topcoat puts its bond in the old kit’s hands. | Grind to concrete Too much new material to stake on a thin film of unknown prep. |
| Professional 100%-solids epoxy (still sound) | Scuff-sand and recoat Long past its recoat window, so there is no chemical bond left to catch. Sand or screen it to an even dull scratch, vacuum, wipe, recoat. | Scuff-sand and recoat The usual way to refresh a sound epoxy floor: abrade it, clean it, and apply the topcoat as its own data sheet directs. | Scuff-sand and recoat If it passes the checks, the old epoxy can be abraded and used as the base for a new broadcast. Chips and low spots get patched first. |
| Polyaspartic or polyurea topcoat | Test first Hard, glossy and chemical-resistant by design, which makes it the hardest surface to grip. Abrade a patch, coat it, tape-test it after cure. | Scuff-sand and recoat Like over like, after full abrasion. Still worth a test patch, because products differ. | Test first Workable over a sound, well-abraded topcoat, but prove it on a patch before committing the whole floor. |
| Acrylic or film-forming sealer | Grind to concrete A sealer is made to stop things soaking in, including primer. It has to be ground off. | Grind to concrete A topcoat over sealer bonds to the sealer, and the sealer is the soft layer. | Grind to concrete No exceptions: bare concrete first. |
| Not sure what it is | Test first Run the three adhesion checks and drip some water on it (beading means a sealer or film). Still unclear after that? Grind. | Test first Same checks. Fast-cure topcoats are the least forgiving of a wrong guess. | Grind to concrete A full system is too much material and labor to put over an unknown base. |
General guidance from typical practice, not a quote or a product recommendation. The new coating’s own data sheet decides the prep, and anything that fails an adhesion check goes to bare concrete regardless of this table.
A recoat that adds a new system rather than refreshing the old one is really a new floor; see what a full garage floor coating involves. And if the floor only needs protection, not a film, a garage floor sealer or polished concrete may be the better buy once the old coating is off.
Repairing Concrete Garage Floor Cracks and Spalls
No coating makes a damaged slab sound again, so the concrete gets fixed first, as part of the same job, after grinding has opened the surface and shown how far the damage goes. Two kinds of damage show up in almost every older garage here: cracks, which are about movement, and spalls and pitting, which are about the surface breaking up.
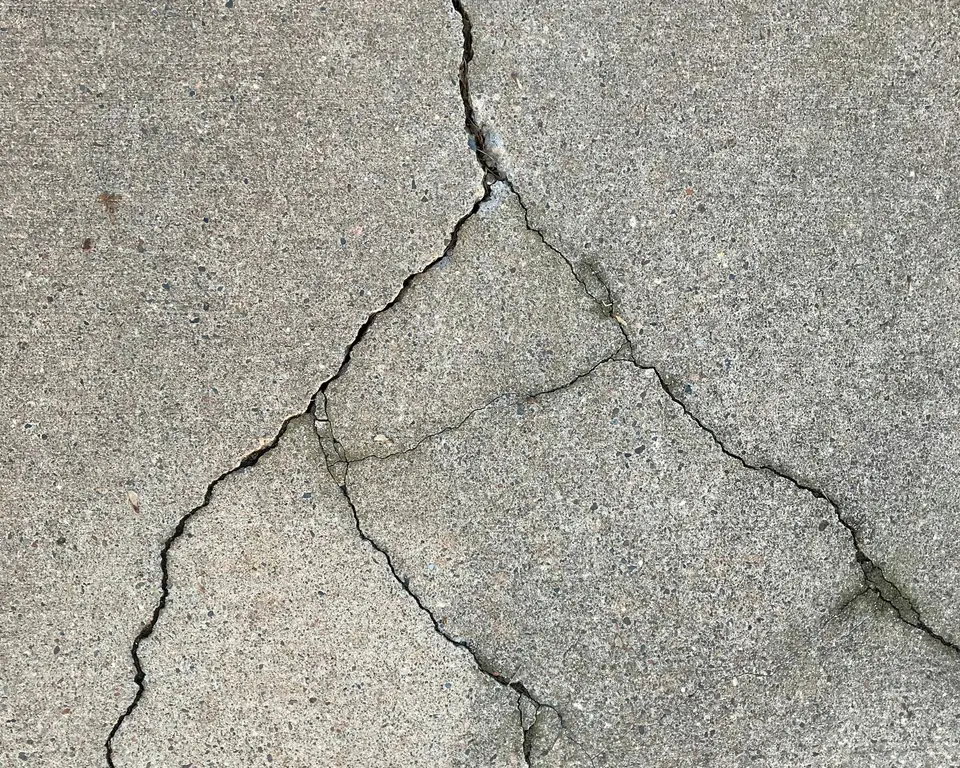
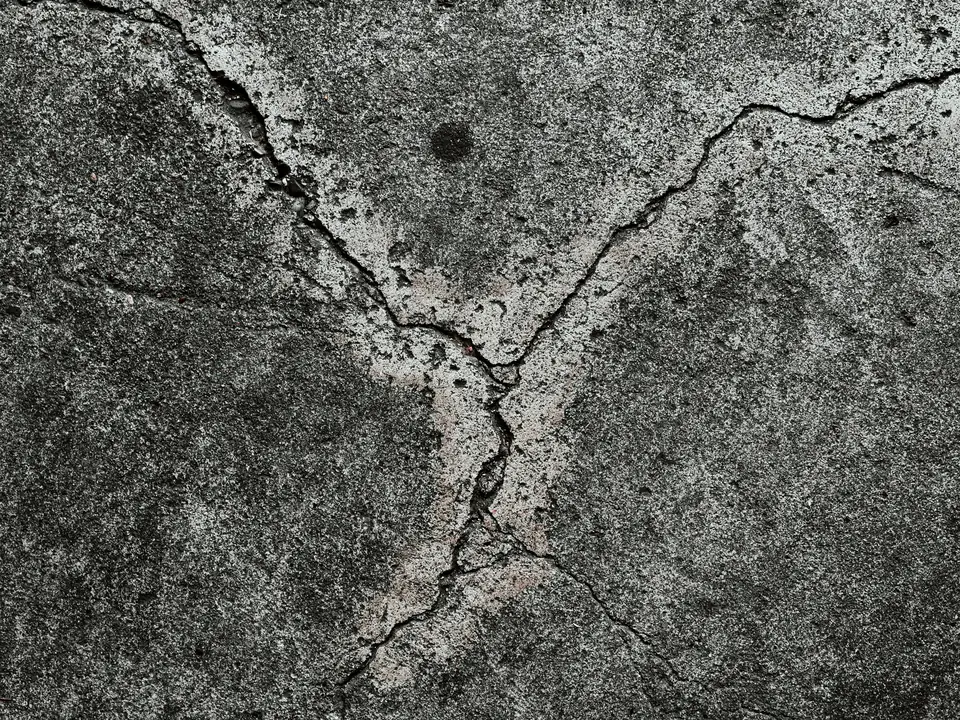
Crack gauge
Find the widest point of the crack and compare it with the bands. Then say whether it is still or moving.
Pick a width and a movement, or read the table below.
| Width | Still | Moving |
|---|---|---|
| Hairline | Cosmetic fill Opened slightly with the grinder during prep and filled; the base coat bridges the rest. It may still read as a faint line. | Cosmetic fill Filled the same way, with a warning you should hear before the job, not after: a crack that moves can reflect back through any coating. |
| About 1/16 in. | Rigid filler, ground flush Cleaned out, filled with a fast-setting epoxy or polyurea crack filler, ground level with the slab, then coated with the rest of the floor. | Flexible joint treatment A rigid fill in a moving crack just cracks again beside it. A flexible filler gives the movement somewhere to go. |
| About 1/8 in. | Rigid filler, ground flush Same as above after the edges are checked. Chipped or crumbling edges get chased back to sound concrete and rebuilt with the fill. | Flexible joint treatment Treated like a joint in the coating rather than buried: flexible filler, and the coating detailed at the line. |
| 1/4 in. or wider | Rigid filler, ground flush Only after a closer look. Lay a straightedge across it: if both sides are level and it has not grown, it is a fill-and-grind repair with a filled resin or repair mortar. | Structural or replacement assessment A wide crack that keeps opening, or one with one side higher than the other, is a slab problem before it is a coating problem. See the replacement section below. |
Is it moving? Draw pencil ticks across the crack at its widest point and at both ends, and write the date beside them. Look again after a few weeks of hard freeze and again in summer. If the ticks no longer line up, or the crack runs past its end marks, it is moving.
Joint or crack? A dead-straight line, cut evenly across the slab, is a control joint: a groove sawn on purpose so the concrete cracks there. Joints are supposed to move a little, so they get a flexible filler or are kept open through the coating. They are never packed with rigid filler and buried.
The lines are drawn at nominal size, but screens scale differently, so use the card as a picture of the bands and measure with a tape or a drill bit. This is typical practice, not an engineering opinion, and it is not a quote.
Spalls and pitting. Where the surface has flaked or popped out, usually inside the door where salt water sits, the loose concrete is chipped and ground back until the tool hits sound material. The hollow is then rebuilt with a resin patch or repair mortar and ground flush so it sits level under the new coat. A concrete industry sheet notes that a sealer keeps “chloride-laden moisture from migrating into the concrete slab,” which is one more reason the repaired door area gets fully coated, not just patched.
Tell us about the cracksWhen you send the form, mention how long a crack has been there and whether it changes in winter. That one fact decides the repair more often than its width does.
Full Removal: Grinding a Failed Coating Off the Slab
When the checks say the coating is loose across the floor, or it is paint or sealer under a new system, the only fix is to take it all off and start from concrete.
- Map it. Tap-test the floor, mark loose areas and anything that needs concrete repair, and note radon pipes, floor drains and sumps that need working around, not over.
- Diamond grinding. A walk-behind grinder with coarse diamond or carbide tooling cuts the coating off and keeps going until the surface is clean, profiled concrete. Thick or rubbery coatings take more passes and different tooling than thin paint.
- Edges and corners. The machine can’t reach the last few inches along walls, steps and stem walls, so those are done with a shrouded hand grinder.
- Dust control. Every grinder runs connected to a dust-collecting vacuum, and the door into the house is sealed off with plastic. Done right, the dust ends up in bags, not in your kitchen.
- Disposal. The ground-off coating and dust are bagged and hauled away with the job.
- Back to the start. Cracks and spalls are repaired, newer and lower-level slabs are moisture-tested, and the floor is ready for a new system, the same as bare concrete.
Chemical strippers and shot blasting exist too. On a residential garage, strippers are slow and messy against tough two-part coatings, and blasting equipment is built for large open floors; grinding is the usual choice. We don’t put a time or a price on removal before seeing the coating, because a thin paint and a thick, well-bonded old epoxy are very different days of work.
Before you scrapeScraping a peeling floor yourself before the estimate is fine for loose flakes, but leave anything that is still stuck. It is the best evidence of what went wrong.
What Garage Floor Repair Contractors Should Put in Writing
Repair estimates are vaguer than new-floor estimates, because nobody knows exactly what the grinder will find. That makes it more important, not less, that the scope says what is known and what happens when something new turns up.
- Which adhesion checks were done, where, and what they showed.
- Whether the job is a spot repair, a recoat over the old coating, or full removal, and which areas each applies to.
- The prep method: sanding or screening the old coat, or grinding to concrete, and the profile the new product calls for.
- How each crack and control joint will be treated: rigid fill, flexible fill, or left open.
- Whether a moisture test is included on a lower-level or newer slab, and what happens if the result is high.
- What happens, and how it is priced, if grinding opens up more damage than expected.
- Whether patched areas will match the rest of the floor, or whether a full topcoat is included to even it out.
- When you can walk on the new material and when you can park on it, taken from its data sheet at the temperature the garage will actually be.
When the Slab Needs Replacing Instead of Repair
Some floors aren’t ours to fix. If a garage slab has heaved or sunk so that one side of a crack sits well above the other, if sections rock underfoot, or if large areas are broken through, no filler and no coating will hold. That slab needs garage floor replacement contractors, meaning a concrete company that tears out and pours new concrete, not a coating crew. We will tell you that at the estimate even though it means there is no job for us that day.
Ground movement is part of the reason. Minnesota’s footing rule puts Washington County in its Zone II, with a 3-1/2 foot minimum frost depth for footings, but it also allows detached one-story private garages up to 1,000 square feet to sit on a slab on grade. That slab rides on the ground rather than on deep footings, and when the ground moves, the slab can go with it.
A new slab is structural work, not finish work, so ask the concrete contractor about permits; the state’s permit exemption covers finish work like floor coatings, not new concrete. Once it is poured, plan on the usual 28-day cure and a moisture test before any coating goes on. That is when we come back into the picture.
Before You Scrape: Answers on Peeling, Recoats and Cracks
Can new epoxy go over old epoxy that is already peeling?
Not over the peeling part. A new coat bonds to whatever is under it, so if the old film is letting go, the new one goes with it. Peeling areas get cut back to sound coating or ground to concrete first. If the old coating passes the adhesion checks everywhere else, the sound areas can be sanded and recoated.
Why does the coating lift exactly where the tires park?
That is usually hot tire pickup. Tires come in hot, soften a thin film, and as they cool they grip it; when the car backs out, the film comes up with the rubber. Thin kit coatings over an acid-etched slab are the classic case. The repair is a thicker, properly bonded system over ground concrete, not another coat of the same kit.
Will a patched spot match the rest of the floor?
Rarely perfectly. Older coatings fade and wear, flake blends change between batches, and new material is glossier on day one. A patch in a corner can blend well enough; a patch in the middle of a tire lane often stays visible. If a perfect match matters to you, the honest option is a full topcoat over the whole floor after the repairs.
Should I fill the cracks myself before the estimate?
Please don’t. Store-bought fillers can be the wrong kind for a moving crack, and they hide what the crack was doing. Leave it open, mark it with pencil ticks and a date if you can, and we will look at it as it is.
Does grinding a coating off fill the house with dust?
It shouldn’t. Removal is done with a shrouded grinder hooked to a dust-collecting vacuum, the door to the house is closed off with plastic, and edges are done with a shrouded hand grinder. Some fine dust settles in the garage itself, so shelves and anything stored there should be covered or moved out.
Will sealing basement floor cracks help with radon?
Not on its own. The Minnesota Department of Health describes sealing as one part of a mitigation system built around a fan, a pipe and a suction point under the slab: “Sealing limits the flow of radon and makes the radon mitigation system more efficient.” A radon test tells you the level; crack repair under a coating is not mitigation.
Describe the Floor That’s Peeling or Cracked
Tell us what the floor is doing and, if you ran them, what the three checks showed. Photos help when we call back: one of the whole floor, one close-up of the worst spot, one of the underside of a peeled flake.
We work in Woodbury and the nearby east-metro communities. If the slab needs a concrete contractor instead of us, we will say so.
Sources and data sheets cited on this page
- ASTM D7234: pull-off adhesion strength of coatings on concrete: store.astm.org/d7234-21.html
- ASTM D4541: pull-off strength of coatings (metal substrates): store.astm.org/d4541-22.html
- Sikafloor-264 product data sheet (epoxy example: recoat window, moisture limit, CSP): industry.sika.com/content/dam/dms/us01/g/sikafloor_-264.pdf
- Sikalastic-748 PA product data sheet (polyaspartic example: 72-hour recoat of broadcast coats): usa.sika.com/content/dam/dms/us01/r/sikalastic_-748_pa.pdf
- ASTM F2170: relative humidity in concrete slabs: store.astm.org/f2170-19a.html
- Torginol FLAKE Flooring technical data sheet (efflorescence limitation): assets.torginol.com/uploads/FLAKE-FLOORING-TDS-2026.pdf
- MPC-100 epoxy technical data sheet (UV discoloration note): cdn.shopify.com/s/files/1/0079/3906/3905/files/MPC-100-TDS.pdf
- Concrete surface profile visual scale (Clemtex, after ICRI): archive.clemtex.com/literature/files/concrete-surface-profile-visual-scale.pdf
- Scaling and deicers (Pennsylvania Aggregates and Concrete Association): www.pacaweb.org/uploads/documents/PIS_Scaling.pdf
- NOAA 1991-2020 annual normals, MSP (freezing days): www.ncei.noaa.gov/data/normals-annualseasonal/1991-2020/access/USW00014922.csv
- Median year structure built, Woodbury and Washington County (ACS 2024 1-year): api.censusreporter.org/1.0/data/show/latest?table_ids=B25035&geo_ids=16000US2771428,05000US27163
- Minnesota Rules 1303.1600 (footing depth, slab-on-grade garages): www.revisor.mn.gov/rules/1303.1600/
- Minnesota Rules 1300.0120 (permit exemptions): www.revisor.mn.gov/rules/1300.0120/
- 28-day cure before coatings (Tnemec): tnemec.com/remedy-index-page/28-day-cure-for-concrete/
- Radon mitigation systems (MDH): www.health.state.mn.us/communities/environment/air/radon/mitigationsystem.html